TL;DR:
- A structured cleaning approach saves time and enhances home hygiene.
- Prioritize wet rooms and high-touch surfaces for effective cleaning.
- Using proper tools and verifying results prevent common cleaning mistakes.
Staring at a cluttered kitchen bench, a grimy bathroom, and a lounge room that seems to collect dust overnight is genuinely stressful. Many Australians, whether renting or owning, find home cleaning feels like an endless cycle with no clear starting point. The good news is that a structured, evidence-backed approach removes the guesswork entirely. This guide walks you through organising your tools, cleaning room by room, targeting high-touch surfaces, and verifying your results. Follow these steps and you will spend less time cleaning while achieving a genuinely hygienic home.
Table of Contents
- Organising your cleaning essentials
- Step-by-step cleaning guide for each room
- High-touch surfaces and hygiene essentials
- Verifying results and troubleshooting common mistakes
- Why cleaning smarter beats cleaning harder
- Let professional cleaners help you go further
- Frequently asked questions
Key Takeaways
| Point | Details |
|---|---|
| Prepare before starting | Gather the right tools and decide between chemical and natural options before you begin cleaning. |
| Clean by room | Tackle wet rooms first and follow step-by-step guides to ensure thorough results. |
| Focus on hygiene | Clean high-touch surfaces regularly and use disinfectants for maximum health benefits. |
| Check your results | Verify your work, especially for bond cleans, to avoid missing critical spots. |
| Expert methods save time | Using microfibre and HEPA tools, and prioritising rooms, delivers better and faster results than simply working harder. |
Organising your cleaning essentials
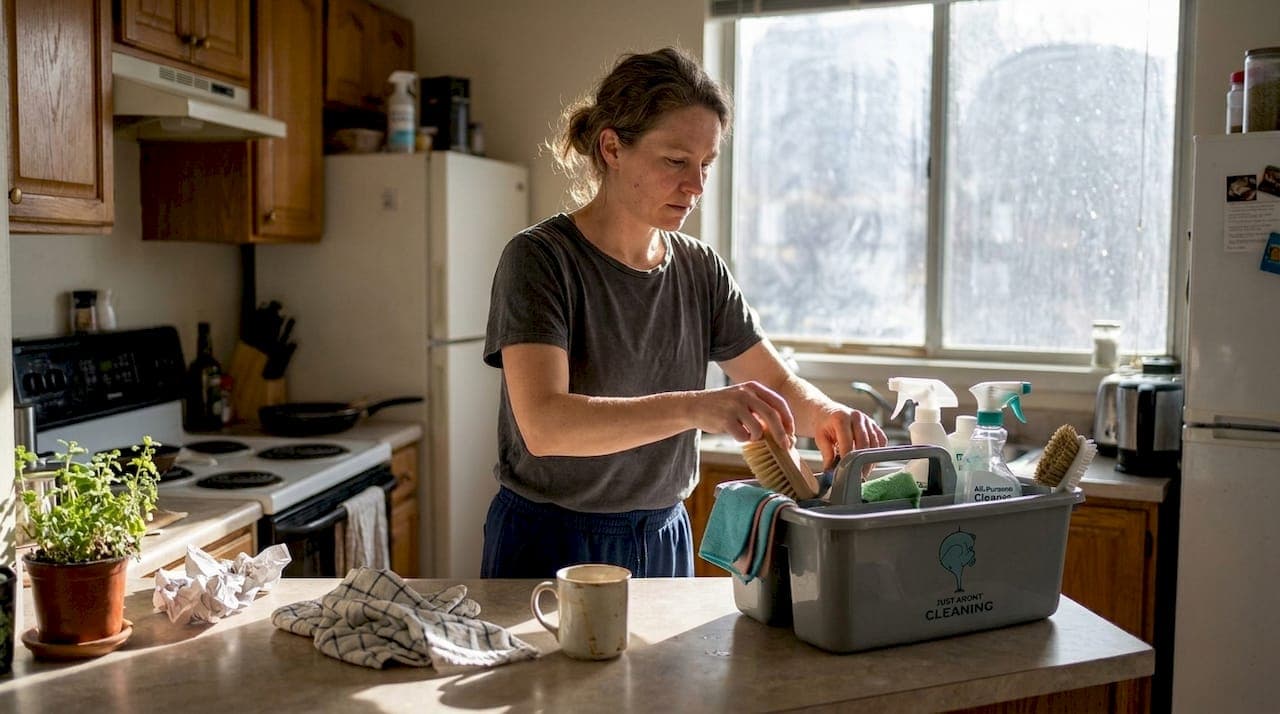
Before you scrub a single surface, getting your toolkit sorted makes every task faster and more effective. Rushing in without the right products or tools is one of the most common reasons cleaning takes twice as long as it should.
The first decision most people face is choosing between chemical disinfectants and natural alternatives. Chemical disinfectants like Dettol are formulated to kill bacteria and viruses on contact, making them the right choice for bathrooms and kitchens where hygiene is critical. Natural solutions like white vinegar and bicarbonate of soda (bicarb) are gentler on surfaces and safer around children and pets, working well on everyday grime and light mould. Importantly, you should always clean before disinfecting because disinfectants are far less effective on dirty surfaces, and you should never mix products as this can create harmful fumes.
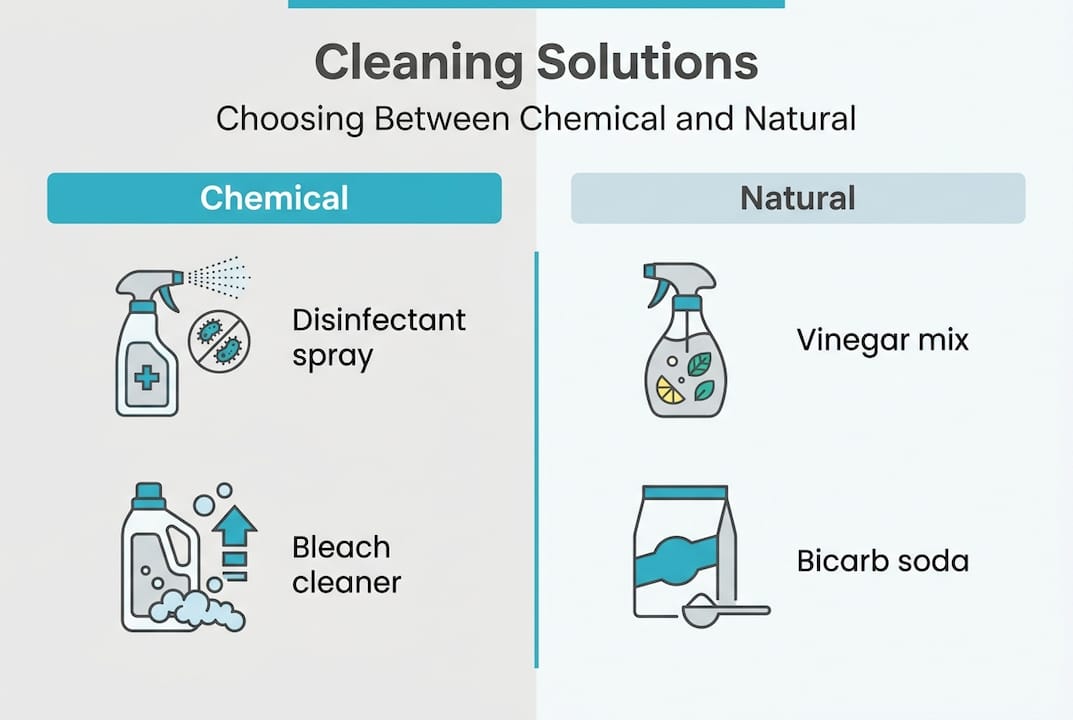
For those interested in reducing their environmental footprint, eco-friendly cleaning solutions have advanced significantly and can deliver excellent results without harsh chemicals.
| Product type | Best use | Key benefit |
|---|---|---|
| Chemical disinfectant | Bathroom, toilet, kitchen | Kills bacteria and viruses |
| White vinegar | Tiles, glass, benchtops | Cuts grease, removes odours |
| Bicarb soda | Grout, sinks, ovens | Gentle abrasive, deodorises |
| Microfibre cloth | All surfaces | Traps dust without spreading it |
| HEPA vacuum | Floors, upholstery | Captures fine particles and allergens |
Your essential toolkit should include:
- Microfibre cloths in different colours for different rooms (this prevents cross-contamination)
- A HEPA-filter vacuum to capture fine dust, pet dander, and allergens rather than redistributing them
- Spray bottles for diluted solutions
- A sturdy mop and bucket for hard floors
- Rubber gloves to protect your skin from both chemical and natural cleaning agents
- An old toothbrush for grout, taps, and tight corners
Investing in quality microfibre cloths and a HEPA vacuum pays off quickly. Microfibre traps particles at a microscopic level, while a HEPA filter ensures allergens do not recirculate into the air. Review home cleaning best practices for further guidance on building an effective routine.
Step-by-step cleaning guide for each room
With your supplies ready, let's move room by room for a systematic approach. The sequence matters more than most people realise.
Always start with wet rooms, specifically the bathroom and kitchen. Applying cleaning products to these areas first gives solutions the dwell time they need to break down grease, soap scum, and bacteria while you work elsewhere. This is a technique professional cleaners rely on consistently.
Recommended room sequence:
- Bathroom: Apply disinfectant to the toilet bowl and let it sit. Spray shower walls, tiles, and grout with a vinegar solution. Wipe down taps, handles, and the basin. Scrub the toilet, then rinse the shower. Finish by mopping the floor.
- Kitchen: Clear the benchtops first, then wipe down splashbacks and appliance surfaces. Clean inside the microwave and oven if needed. Degrease the stovetop. Wipe cabinet handles and the fridge exterior. Mop last.
- Living areas: Dust from top to bottom, starting with ceiling fans and shelves before vacuuming floors. This prevents re-depositing dust onto already-clean surfaces.
- Bedrooms: Strip and wash bedding weekly. Vacuum under the bed and behind furniture. Wipe skirting boards and window sills.
- Hallways and laundry: Sweep or vacuum, then mop. Wipe down the laundry sink and washing machine exterior.
For renters, the bathroom and kitchen are the areas most scrutinised during a bond inspection. Bond clean requirements are strict, and grout shining, mould-free tiles, and spotless fixtures are non-negotiable. As deep cleaning advice confirms, bathroom grout and fixtures are among the most commonly failed points during end-of-lease inspections.
"Cleaning top to bottom, wet rooms first, and allowing dwell time for products are the three habits that separate a thorough clean from a surface-level one."
Pro Tip: Keep a small spray bottle of diluted white vinegar in the bathroom and give shower tiles a quick spray after each use. This simple habit dramatically reduces the build-up of soap scum and mould between deep cleans.
For spotless living tips that extend beyond the basics, building a weekly maintenance schedule around this room sequence will save you significant time each fortnight.
High-touch surfaces and hygiene essentials
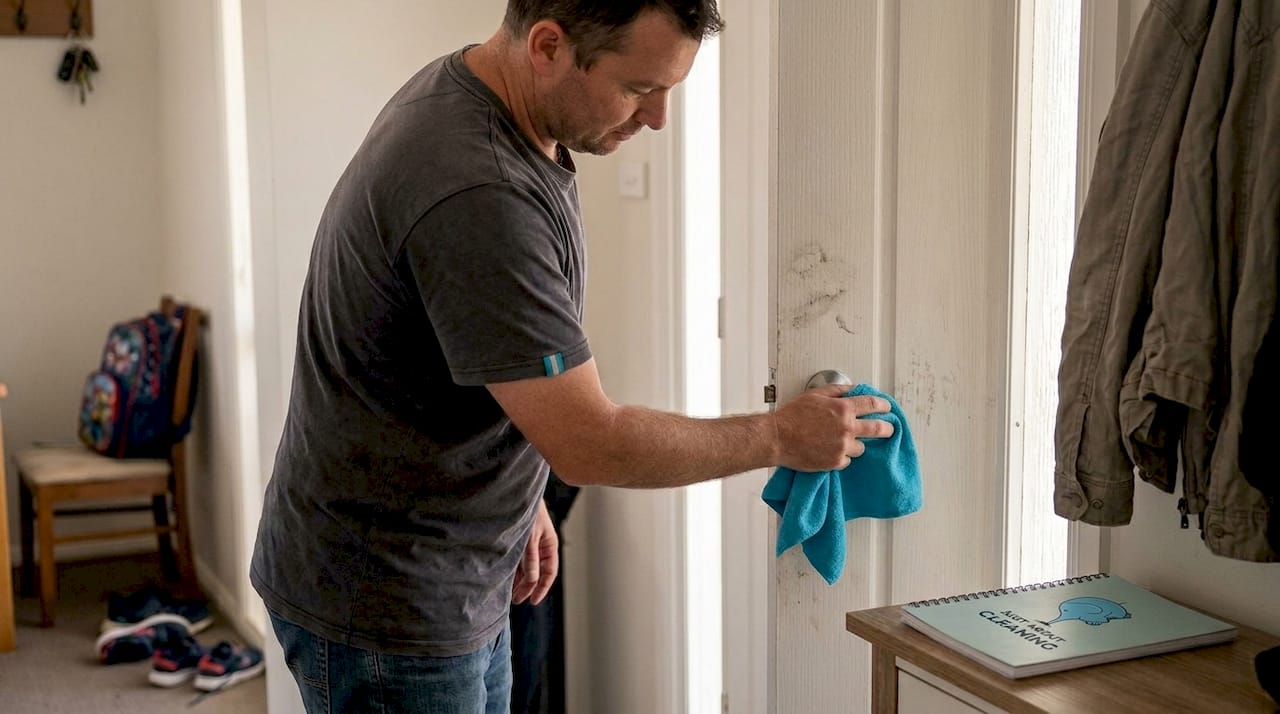
With rooms addressed, let's narrow in on the surfaces most prone to germs and grime. High-touch surfaces are areas that multiple people contact repeatedly throughout the day, and they harbour bacteria far more than most people expect.
Common high-touch surfaces in the home include:
- Door handles and light switches throughout the house
- Tap handles in bathrooms and the kitchen
- Remote controls and phone charging areas
- Fridge and microwave door handles
- Toilet flush buttons and seat hinges
- Stair railings and cabinet knobs
The correct order is always to clean first, then disinfect. Cleaning removes visible dirt and organic matter, while disinfecting kills the pathogens that remain. Skipping the cleaning step means your disinfectant is working against a barrier of grime, which significantly reduces its effectiveness. According to hygiene advice, clean before disinfecting every time and never mix products such as bleach and ammonia-based cleaners as the combination produces toxic gases.
Regular disinfecting of these contact points has a measurable impact on household health. Reducing the bacterial load on surfaces you touch dozens of times daily lowers the risk of spreading illness between family members. For a deeper look at how this principle applies in shared environments, disinfecting contact points in offices follows the same logic as at home.
Pro Tip: Use a different coloured microfibre cloth for the toilet area versus the rest of the bathroom. This one habit eliminates cross-contamination and is standard practice in professional cleaning.
Research into health and efficiency consistently shows that cleaner environments reduce sick days and improve wellbeing. Even in retail settings, retail hygiene insights demonstrate that surface hygiene directly influences how safe and comfortable people feel in a space.
For time-pressed households, focus your disinfecting efforts on the bathroom and kitchen high-touch points daily, and extend to the rest of the home at least once a week.
Verifying results and troubleshooting common mistakes
Once you have finished the active cleaning, it is time to confirm you have achieved a truly hygienic home. Many people assume the job is done when surfaces look clean, but appearance alone is not a reliable measure.
Verification checklist:
- Run your finger along skirting boards, window sills, and the tops of door frames. If you collect dust, those areas need another pass.
- Check grout lines in the bathroom and kitchen. Grout should be uniform in colour with no dark patches indicating mould or mildew.
- Inspect glass surfaces (mirrors, shower screens, windows) at an angle against the light. Streaks indicate residue from cleaning products.
- Open kitchen and bathroom cupboards. Wipe down shelves and check for crumbs, spills, or moisture that could encourage mould.
- Smell-test the bathroom. A persistent musty odour after cleaning suggests mould is present behind tiles or under the vanity.
For renters preparing for a bond inspection, top cleaning standards provide a useful benchmark for what property managers expect. The deep cleaning process used by professionals addresses exactly the areas most commonly missed during a DIY clean.
Common mistakes and how to fix them:
| Mistake | Why it happens | Quick fix |
|---|---|---|
| Streaky glass | Too much product or wrong cloth | Use a dry microfibre cloth to buff dry |
| Lingering odours | Mould not fully treated | Apply bicarb paste, leave 15 minutes, scrub |
| Missed grout | Rushing the bathroom | Use an old toothbrush with vinegar solution |
| Product residue on benchtops | Not rinsing after cleaning | Wipe down with a damp cloth after each product |
As troubleshooting advice highlights, missed grout and fixtures are the most frequent reasons bond cleans fail inspection. Address these areas methodically and you will avoid the cost and stress of a re-clean.
Pro Tip: Walk through each room after cleaning with a torch or phone light held at a low angle to the surface. This reveals dust, streaks, and missed spots that are invisible under normal lighting.
Why cleaning smarter beats cleaning harder
Most people respond to a dirty home by simply putting in more time and effort. More scrubbing, more product, more hours. But after more than 15 years working in professional cleaning across Australia, the pattern we see consistently is that method matters far more than muscle.
The single biggest efficiency gain comes from prioritising wet rooms first. Applying product to bathroom and kitchen surfaces at the start of your session and letting it dwell while you tackle other areas means the chemistry does the work for you. You return to surfaces that are already broken down and ready to wipe. This is exactly why wet room prioritisation is standard in professional cleaning workflows.
The second shift is in tools. Microfibre cloths and HEPA vacuums are not premium extras. They are the baseline for an efficient clean. A standard cloth pushes particles around; microfibre captures them. A standard vacuum redistributes fine dust into the air; a HEPA filter removes it. For practical guidance on building this efficiency into your routine, cleaning efficiency tips offer a useful framework.
Work smarter, not harder. Your home will be cleaner, and you will finish faster.
Let professional cleaners help you go further
If tackling your home feels daunting, there is support within reach. Sometimes a home needs more than a regular clean, whether that is a thorough bond clean before moving out, a post-renovation deep clean, or simply a scheduled maintenance service to keep things consistently hygienic.
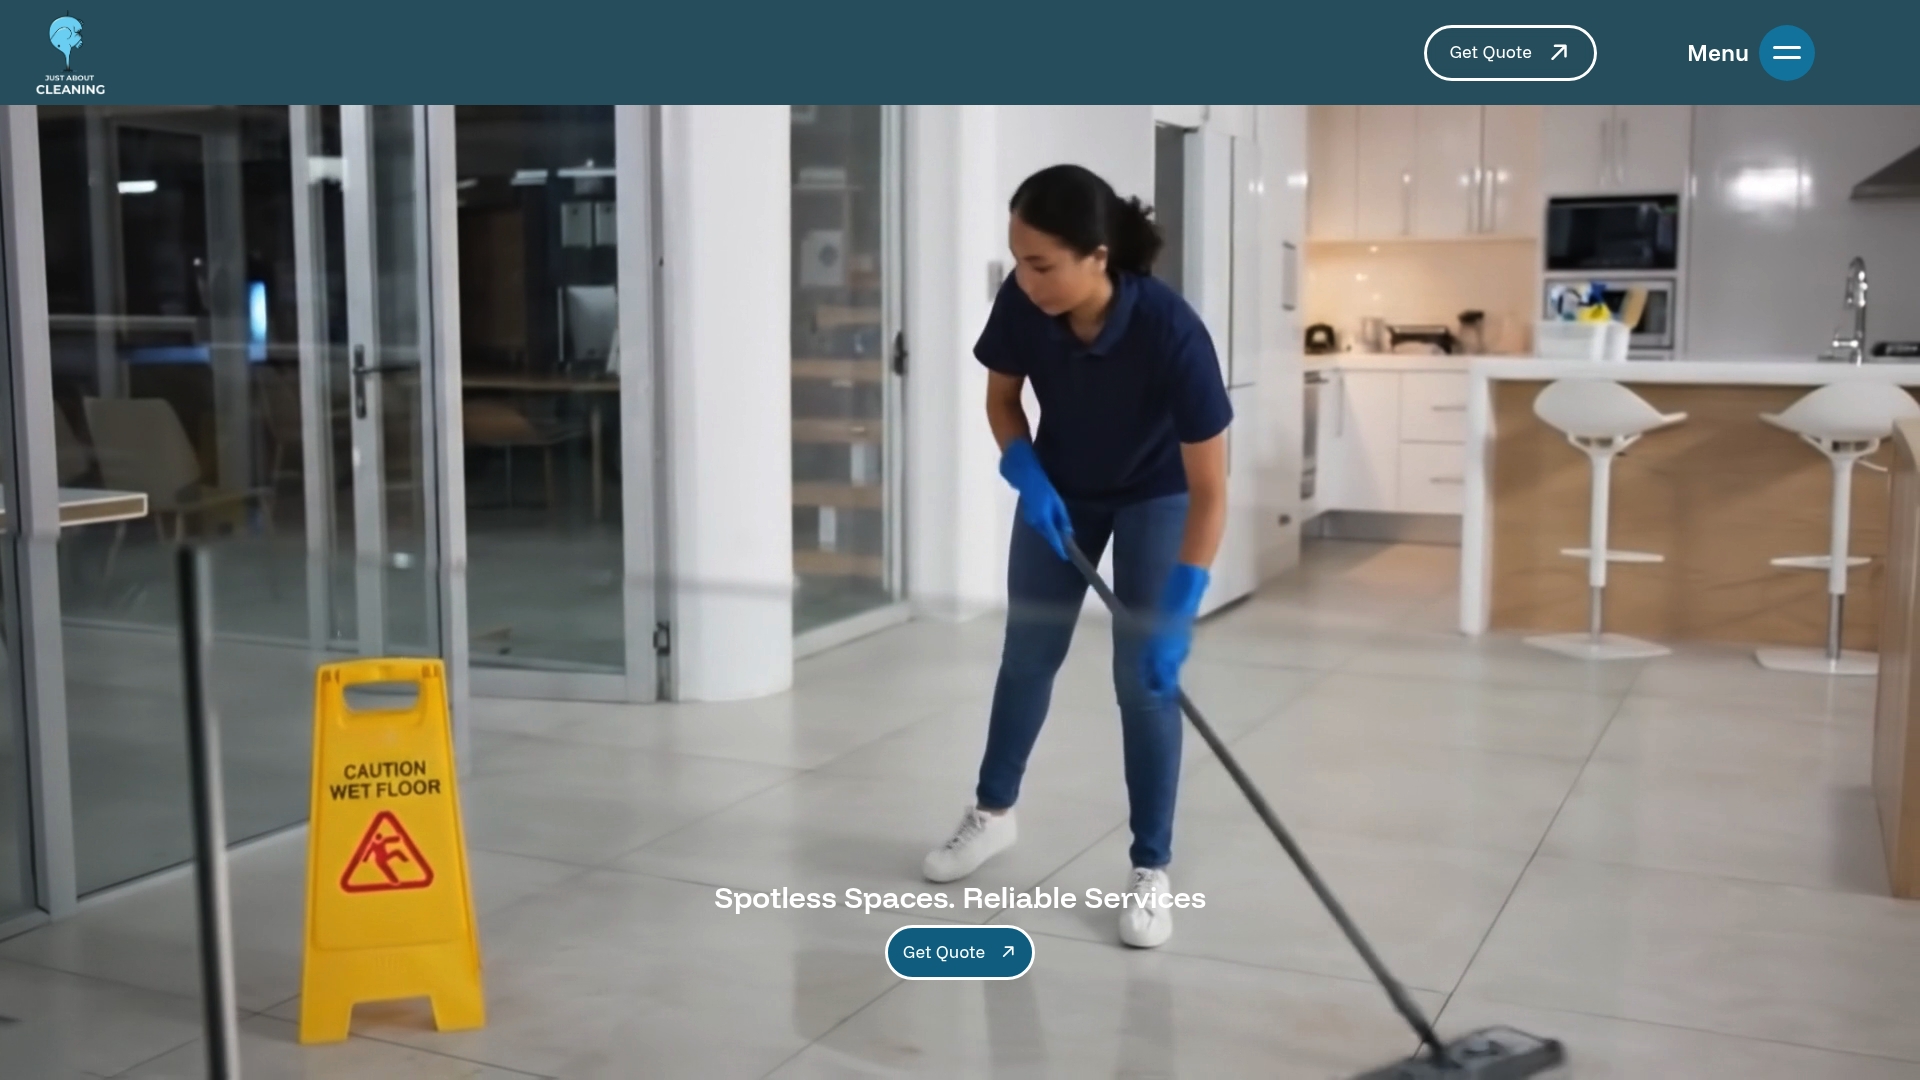
At Just About Cleaning Australia, our trained crews bring over 15 years of experience and the right equipment to handle every corner of your home to a professional standard. We offer professional cleaning services across Australia, including bond cleaning in Australia that meets lease requirements and gives renters confidence at inspection time. Our eco-friendly practices mean your home is clean without unnecessary chemical exposure. Reach out today to find out how we can support your cleaning needs.
Frequently asked questions
What are the safest cleaning products for homes with pets or children?
Natural solutions like vinegar and bicarb soda are safer for homes with pets or children, but always check for allergies and avoid mixing cleaning products as some combinations produce harmful fumes.
How often should I disinfect high-touch surfaces?
Disinfect high-touch surfaces at least weekly, and increase frequency during illness outbreaks or when multiple people are using the home. Always clean before disinfecting for best results.
What is a bond clean and why is it important for renters?
A bond clean is a thorough clean required to meet lease obligations when moving out, with particular focus on grout, fixtures, and kitchen surfaces that property managers inspect closely.
Should I clean or disinfect first?
Always clean surfaces to remove dirt and grime before disinfecting, since disinfectants are less effective when applied over dirty or greasy surfaces.